GitLab Issues
Overview
NudgeBee integrates with GitLab for issue tracking. Events, alerts, and autopilot actions can automatically create or update GitLab issues in your projects.
For the full integration guide including merge request automation and repository setup, see the GitLab Integration Guide.
Generate a Personal Access Token
- In GitLab, go to Settings > Access Tokens.
- Enter a Token name (e.g.,
nudgebee-tickets). - Select the
apiscope. - Click Create personal access token.
- Copy the token — it will not be shown again.
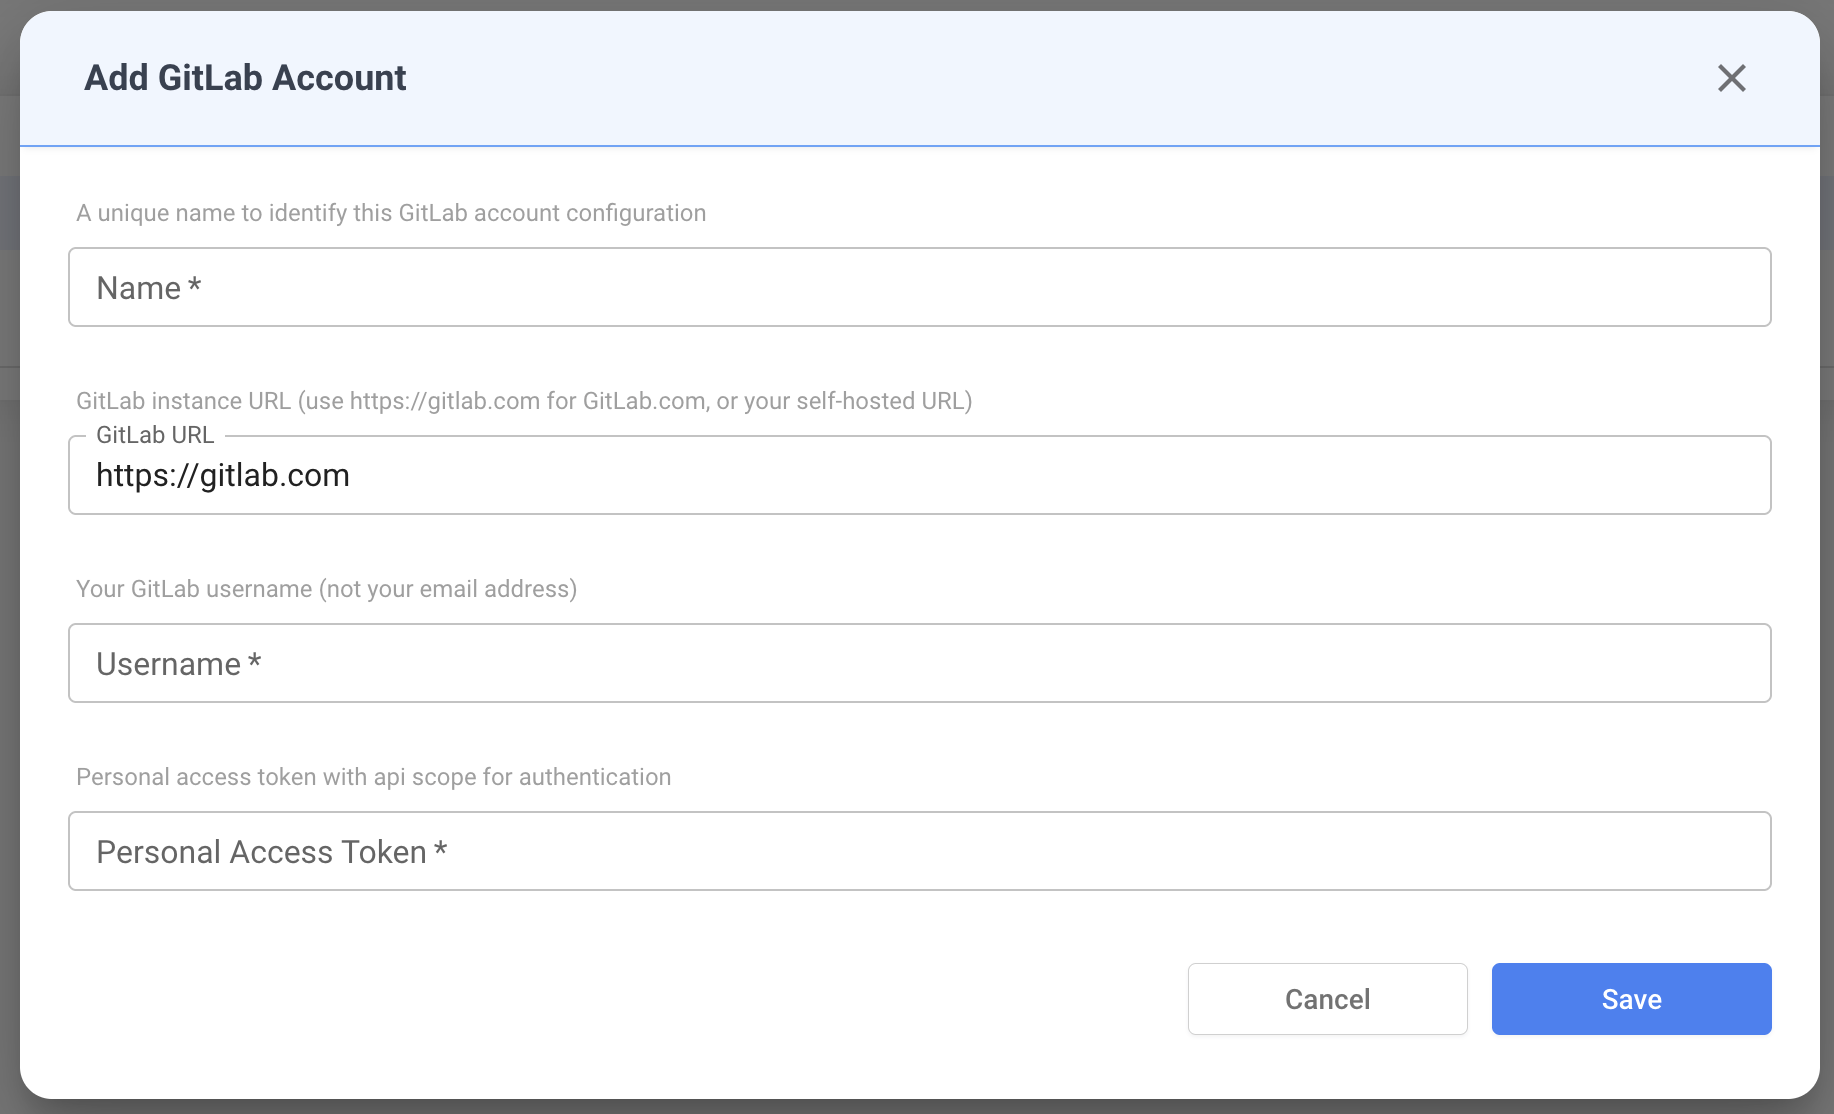
Add GitLab Account in NudgeBee
- Navigate to Settings > Integrations > Repos tab.
- Click the Gitlab tile, then click Add GitLab Account.
- Fill in:
- Name — Unique name for this configuration
- GitLab URL —
https://gitlab.com(or your self-hosted URL) - Username — Your GitLab username
- Personal Access Token — The token from the previous step
- Click Save.
NudgeBee validates credentials on save by authenticating against the GitLab API. If validation fails, check that the username matches the PAT owner and the token has api scope.
Creating Issues
Once configured, GitLab issues can be created:
- Automatically — from events, alerts, or autopilot runbook actions
- Manually — from the NudgeBee event detail view
Each issue includes:
- Title and description with event context
- A
nudgebeelabel for tracking - Optional assignee and custom labels
NudgeBee tracks issues by reference ID. Duplicate events add a comment to the existing issue rather than opening a new one.
Self-Hosted GitLab
Set the GitLab URL field to your instance URL (e.g., https://gitlab.internal.company.com). All operations use this base URL automatically.