RabbitMQ
Connect a RabbitMQ broker so NudgeBee can inspect queues, exchanges and bindings, and act on them from workflows. RabbitMQ is listed under Messaging Queue in the integrations catalog.
RabbitMQ is connected through a Kubernetes Secret only. The broker must be reachable from a cluster where the NudgeBee agent is installed; there is no Proxy Agent mode for this integration.
When Do You Need This?
This integration is optional. Connect RabbitMQ when you want to:
- See queue depth, consumer counts and bindings while diagnosing a backlog or a stalled consumer.
- Drive the broker from an automation using the
mq.rabbitmqadmin.clitask — listing queues as evidence in a runbook, or publishing a probe message to verify a fix.
Prerequisites
-
The management plugin enabled on the broker.
rabbitmqadmintalks to the management HTTP API, not AMQP, so without it every command fails.rabbitmq-plugins enable rabbitmq_management -
A RabbitMQ user NudgeBee can authenticate as, with the
monitoringtag for read access. Grantmanagementoradministratoronly if workflows need to publish or modify objects.rabbitmqctl add_user nudgebee '<YOUR_PASSWORD>'
rabbitmqctl set_user_tags nudgebee monitoring
rabbitmqctl set_permissions -p / nudgebee "" "" ".*"
Step 1: Create the Kubernetes Secret
The secret must contain all four keys:
| Key | Value |
|---|---|
RABBITMQ_HOST | Hostname or service DNS name, e.g. rabbitmq.messaging.svc.cluster.local |
RABBITMQ_PORT | Port NudgeBee connects on. The management API listens on 15672 by default. |
RABBITMQ_USER | Username |
RABBITMQ_PASSWORD | Password |
kubectl create secret generic rabbit-secret \
  --namespace messaging \
  --from-literal=RABBITMQ_HOST=rabbitmq.messaging.svc.cluster.local \
  --from-literal=RABBITMQ_PORT=15672 \
  --from-literal=RABBITMQ_USER=nudgebee \
  --from-literal=RABBITMQ_PASSWORD='<YOUR_PASSWORD>'
Step 2: Configure the Integration in NudgeBee
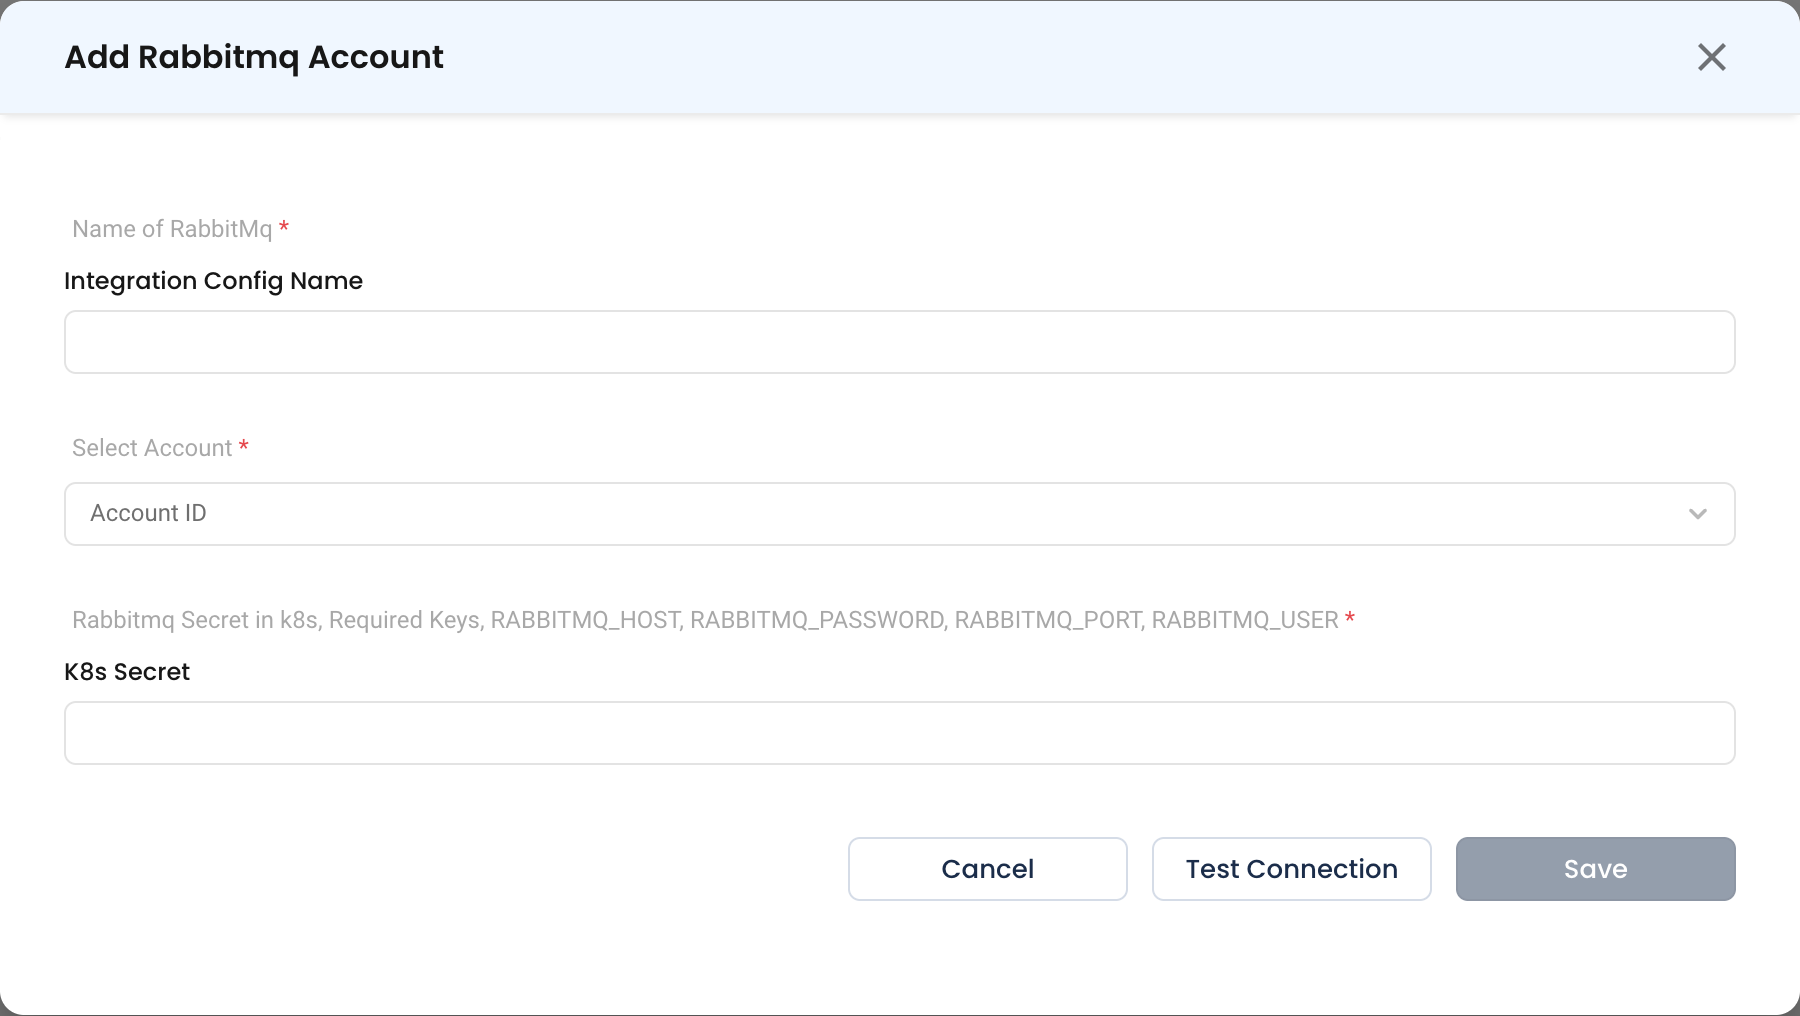
Navigate to Admin > Integrations > Messaging Queue and select RabbitMQ, then click Add Rabbitmq Account.

- Name of RabbitMq * (Required) — How this broker is identified elsewhere in NudgeBee, e.g.
orders-broker-prod. - Select Account * (Required) — The NudgeBee account this connection belongs to. Selecting several lets one broker serve multiple clusters.
- Rabbitmq Secret in k8s * (Required) — The name of the secret created in Step 1.
Step 3: Test and Save
Click Test Connection, then Save.
Verify the Integration
- Click Test Connection on the form — it should succeed before you save.
- In a workflow, run an
mq.rabbitmqadmin.clitask with the commandlist queues. The response should list your queues with their message counts.
Troubleshooting
| Symptom | Likely Cause | Fix |
|---|---|---|
| Every command fails to connect | Management plugin not enabled | rabbitmq-plugins enable rabbitmq_management and retry. |
| Connection refused on port 5672 | AMQP port used instead of the management port | Set RABBITMQ_PORT to the management API port, 15672 by default. |
401 Unauthorized | Wrong credentials, or the user has no management access | Confirm the password and set at least the monitoring user tag. |
list queues returns nothing | The user has no permissions on the vhost | rabbitmqctl set_permissions -p / nudgebee "" "" ".*" |
| Publish commands are refused | The user only has read access | Grant write permissions on the vhost, or the management tag. |
| Secret saves but connection fails | A key is missing or misspelled | The secret must contain all four keys exactly as listed above. |