Amazon Web Services (AWS)
NudgeBee connects to your AWS accounts to discover resources, collect CloudWatch alarms, and analyze Cost & Usage Reports (CUR) for cost optimization. You can connect a single account using one of three methods, or onboard an entire AWS Organization at once.
Connecting a Single Account
Open Admin → Integrations → AWS → Add AWS Account. The form offers three connection methods as tabs — CloudFormation, IAM Role ARN, and Access Keys — so you can pick whichever fits your AWS setup.
Fields Common to All Methods
- Display Name (required) — a friendly name to identify this account in NudgeBee (e.g.
aws-production). - Access Mode — choose Standard (read + write, allows NudgeBee to create CloudWatch alarms and apply recommendations) or Read-Only (monitoring only).
- Enable SSM Parameter Store access (CloudFormation method) — lets NudgeBee read SSM parameter values. Only enable this if your parameters do not contain secrets.
Method 1 — CloudFormation (Recommended)
This method uses an AWS CloudFormation stack to create the required IAM role automatically, and NudgeBee detects the account once the stack is created — no values need to be copied back.
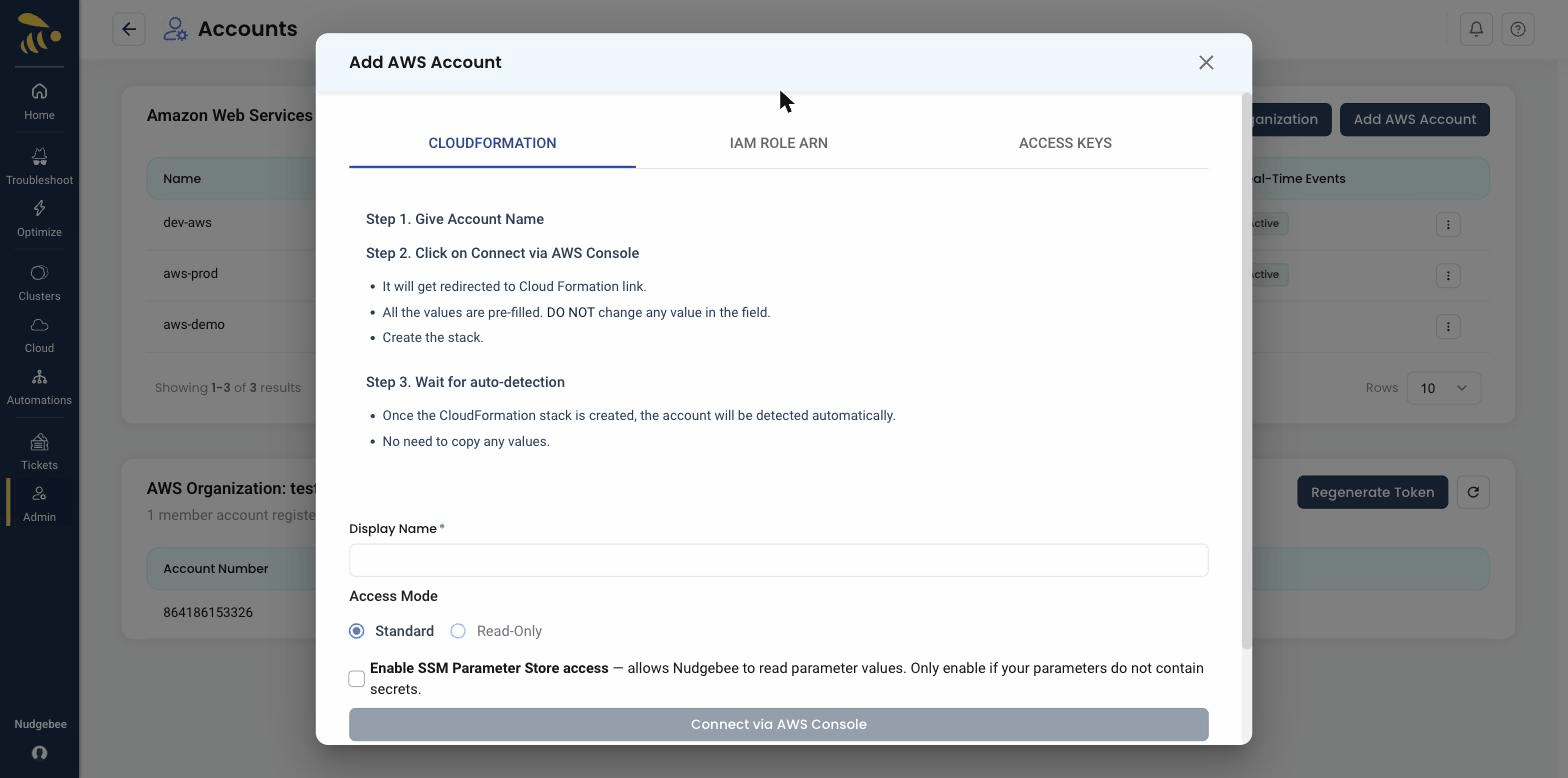
- Give the account a name — enter a Display Name.
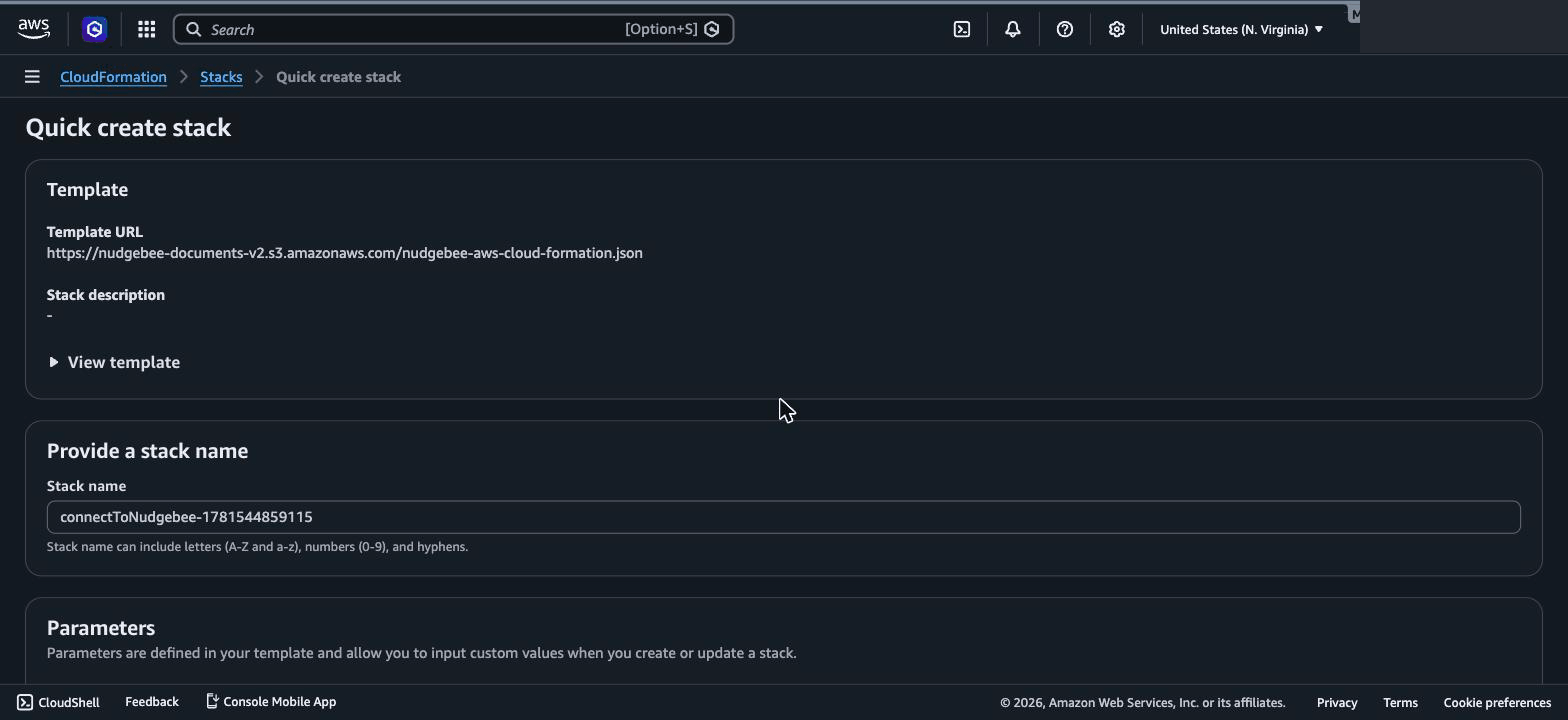
- Click "Connect via AWS Console" — you are redirected to the AWS CloudFormation console in a new tab with the template pre-loaded. Do not change any pre-filled values. Acknowledge that the stack may create IAM resources and click Create stack.
- Wait for auto-detection — once the CloudFormation stack reaches
CREATE_COMPLETE, the account is detected and registered automatically. There is no need to copy a Role ARN back into NudgeBee.
In the AWS Console, the Quick create stack page opens with the NudgeBee template and stack name pre-filled. Leave the values unchanged, acknowledge the IAM capabilities at the bottom, and click Create stack.
Method 2 — IAM Role ARN
Use this flow if you already have a cross-account IAM role that NudgeBee can assume.
The role must allow sts:AssumeRole, cur:DescribeReportDefinitions, and s3:GetBucketLocation / s3:ListBucket on the CUR bucket.
- Enter a Display Name and choose an Access Mode.
- Paste the IAM Role ARN (e.g.
arn:aws:iam::123456789012:role/NudgebeeRole). - Optionally provide an External ID — required only if the role's trust policy specifies one.
- Click Validate — NudgeBee probes STS, Cost & Usage Report discovery, and CUR S3 access upfront — then click Connect.
Method 3 — Access Keys
Use this flow when you cannot grant a cross-account role (for example, segregated billing accounts or dev/test accounts). Create an IAM user with the same CUR + read-only permissions as the CloudFormation template, then provide its keys.
- Enter a Display Name and choose an Access Mode.
- Paste the AWS Access Key ID and AWS Secret Access Key.
- Set the AWS Region used to bootstrap the AWS SDK (CUR discovery always runs in
us-east-1). - Click Validate, then Connect.
Onboarding an Entire AWS Organization
To connect many accounts at once, use AWS Organization onboarding, which deploys a CloudFormation StackSet across your organization.
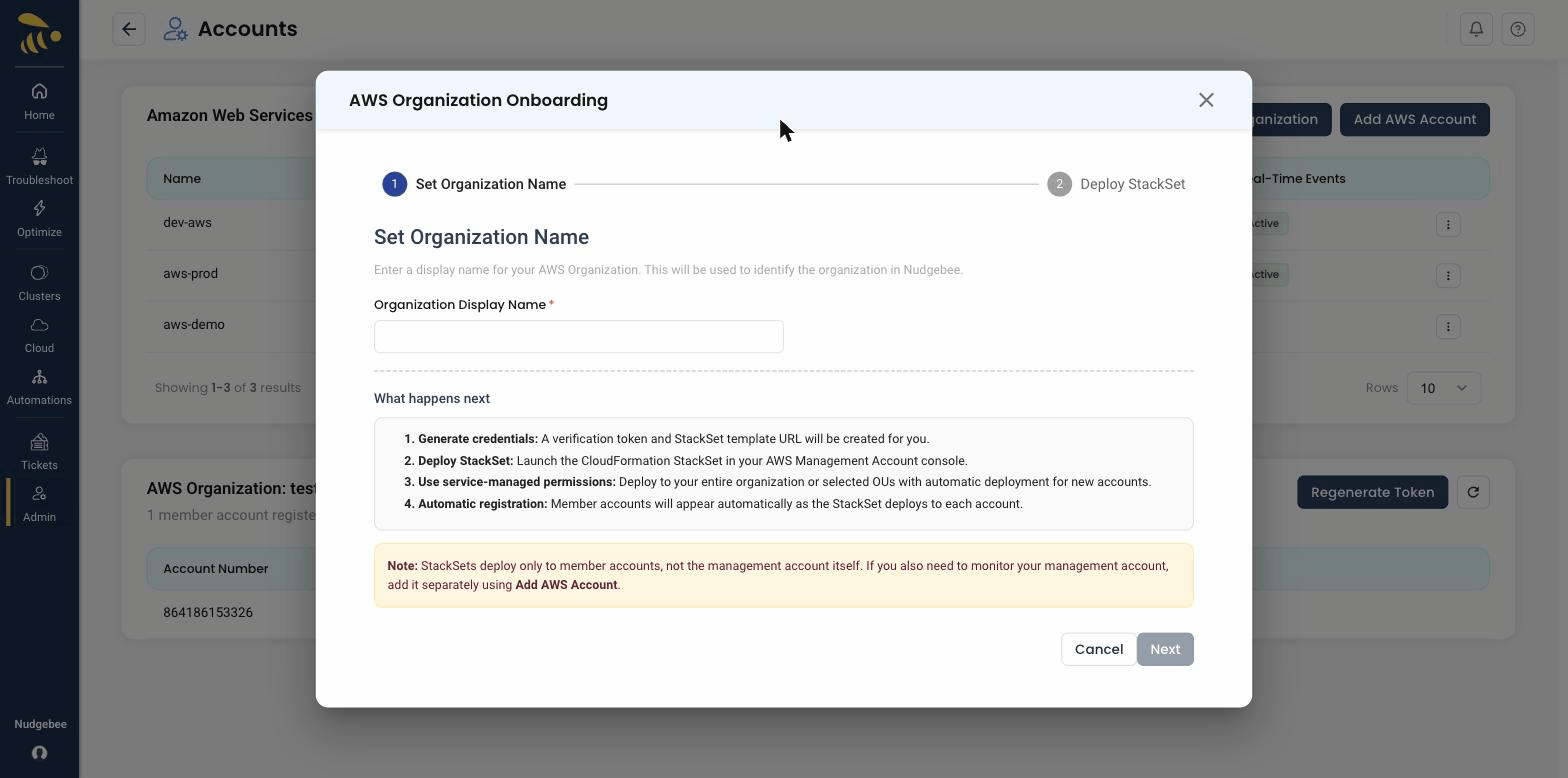
- Set Organization Name — enter a display name for the organization.
- Generate credentials — NudgeBee creates a verification token and a StackSet template URL for you.
- Deploy the StackSet — launch the CloudFormation StackSet in your AWS Management Account console using service-managed permissions, targeting your entire organization or selected OUs (with automatic deployment for new accounts).
- Automatic registration — member accounts appear in NudgeBee automatically as the StackSet deploys to each one.
StackSets deploy only to member accounts, not the management account itself. If you also want to monitor your management account, add it separately using Add AWS Account.
CloudWatch Alarms Permissions
NudgeBee collects existing CloudWatch alarms from your AWS account and can create new alarms based on recommendations.
Permissions Included in CloudFormation Template
The CloudFormation template includes:
Read permissions (via ReadOnlyAccess managed policy):
cloudwatch:DescribeAlarms
cloudwatch:DescribeAlarmsForMetric
Write permissions (included when the account is connected in Standard access mode):
cloudwatch:PutMetricAlarm
These permissions allow NudgeBee to both monitor existing alarms and create new ones for your resources.